Directions

Our latest entry always comes up first...

Click this link if you want to start at the beginning of our trip from
South Carolina (where we bought the boat) to Lake Ontario Click this link:

If you want to see the story of our 2 1/2 year project getting
Blowin' Bubbles ready for our life on board click here:
FIRST "REFIT" BLOG ENTRY - March 2011

If you want to start at the beginning of our trip:
START OF TRIP - July 2014
2015, 2016, 2017, 2018, 2019

Monday, August 13, 2012

An Awesome Looking Arch....

Today was an incredibly long day where we drove over 450 kilometers (300 miles) from home to the town where our solar and wind generator arch is being built Klacko Marine ....  To save some money I offered to pick up the unit in its early construction stage and bring it to the boat to be test fitted.  The factory was not that far away, but by the time we went there then back to the house, then to the boat, then back to the factory, then back home.... Well, you get the picture....


Yet at the end of the day I am happy to say we are well on the way to having an awesome looking arch that will take care of many more things than just the solar panels and the wind generator....

This arch will also hold VHF antenna, a GPS antenna, a weather station, the crane that lifts scuba gear and the outboard engine for the dinghy, the barbecue, a fish cleaning table lights that will light up the transom, our Canadian flag halyard, the outboard engine and so on and so on....

Big thanks to my father in law, Ed who loaned me his trailer and came along to help all day.

The trip ended at Fastenal to pick up the mounting hardware for the plate that I will be installing at the aft of the hull near the transom that will become the attachment point for the Jordan Series Drogue that I talked about in an earlier entry... I bought this plate from Klacko

I can't say enough really good things about Doug and his company at this point....  What a great guy to do business with!

While I am blowing the horn for businesses,, the folks a Fastenal here in Cambridge have been pretty awesome too.  If you are ever doing a major project they are willing to set up an account and provide a pretty fair discount if you meet their purchase requirements... (Lets just say I have REALLY surpassed the minimum requirements.....)

That's it for today....

Sunday, August 12, 2012

Re-built Shower.... AMAZING!!!!

A few months ago I "finished" building a new shower stall just off the forward head (bathroom)....  When my brother in law (Denis, who is a flooring/tile guy) saw it he tried to be polite, but clearly he thought the job I did with flooring on the walls, well.... SUCKED!...

Yesterday morning he showed up at my house (he lives in Sudbury, 5 hours away) at 7:30 with coffee and some awesome wall board material called Altro Whiterock.  Together we spent a few hours yesterday and I spent a few more hours today, making the shower stall look AMAZING!....


FINISHED!


I also used some of the leftover material to build a shield over all the wiring in the electrical closet to protect everything from getting damaged if something moves...  I also made a cover for the AC connection box...


As soon as we have a day with no rain in the forecast I will get the bottom painted... Then I can start to clean up the boat and get it ready to launch in the spring... I only have a few welding jobs left to finish then we can clean the boat thoroughly and then put some of our stuff away....

Wednesday, August 8, 2012

A REALLY Full Day...

Today started really early (6:00).... The first job was to figure out a way to get the main mast ready for the tri-sail (storm) track that I ordered yesterday... As you can see in the picture I had some obstacles to work around to be able to leave the sail attached to the mast and ready to go.... I found a piece of plastic extrusion and trimmed it to fit around the winch and the bracket where the boom attaches to the mast.... Then I mixed up a really thick batch of epoxy and attach it to the mast... this will work really well (I hope).... We will see when the track arrives next week....


Next, I finished sanding the boot strap then painted it... I ended up having JUST enough paint! Whew.... I think it looks great...


Then I sanded the teak all around the gunnels followed by a coat of slow curing epoxy... I have to tell you that I have had really good luck using epoxy instead of varnish... Fortunately, Shelley came by this afternoon and masked the gunnel making it possible to get this done today...


Around 4pm we came home only to realize that when we got home that I had forgotten to load the life raft into the car to take it to the appointment to have it inspected and re-packed in Toronto tomorrow.

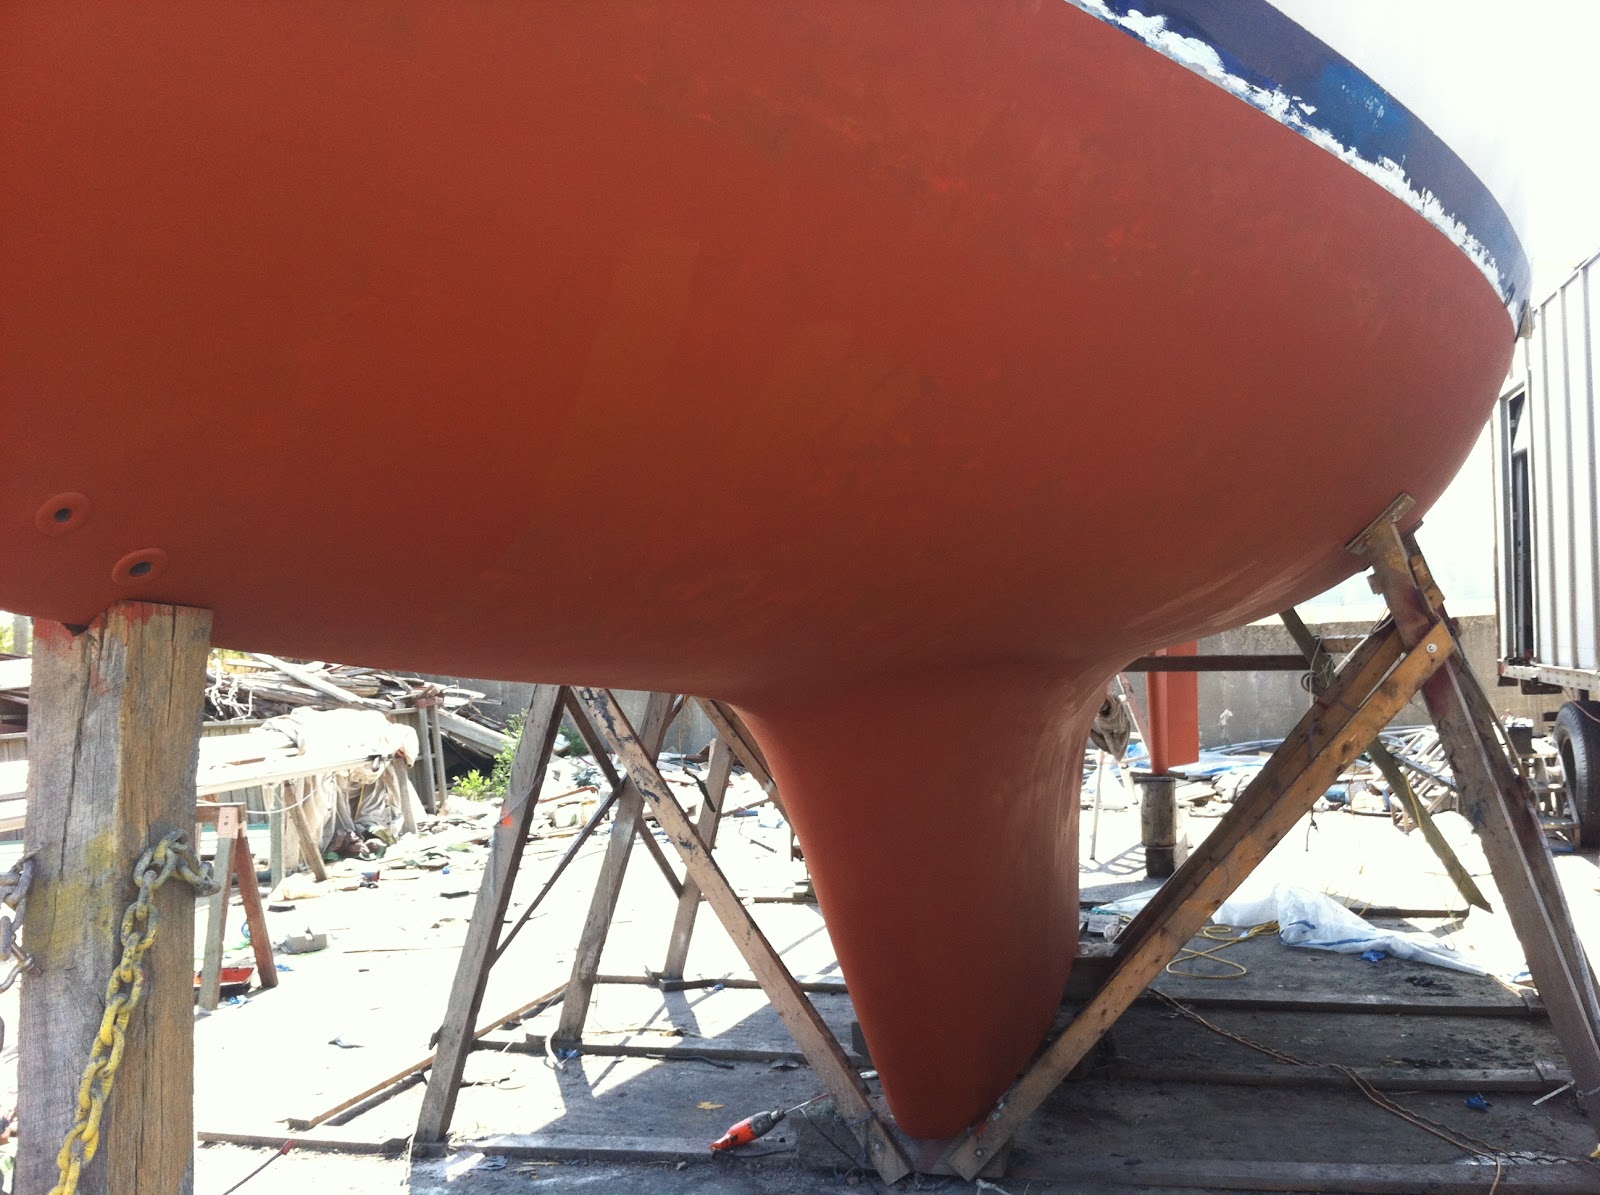
So... After supper we headed back to the boat and decided that since we had to go back anyway, we would try a test area for the first coat of bottom paint... Yesterday I called the paint company to talk about the instruction pertaining to the 60 day limit before the boat must go in the water... Jim (the man in customer service at Trinidad) suggested that since we didn't plan to put the boat in the water till the spring we should still paint ONE coat of bottom paint then next spring give it a light sand and apply the second coat, then launch...

The reason that the boat needs to be launched within 60 days is that the outside of the layer cures too hard to let the copper leach out, thus severely limiting it anti fowling properties.... By sanding and then applying a coat just before launch the surface will be re-softened allowing the copper to leach out properly....

The reason we wanted to test is because of the problem we had with the primer... Over the last few days I have really sanded the epoxy barrier coat and am hoping the bottom paint will adhere properly.... Cross your fingers....

While I was painting, my cell phone went off and it was Brian (one on my welders) who said he had time to come by an weld the tangs for the inner forestay... Great! So as darkness was falling we finished welding on the tangs and figured out how we will repair and re-build the anchor rollers... Hopefully we can do that in the next few days...

I got a call today from Doug at Klacco who had another customer cancel a job thus creating an opening to get my arches built sooner than planned... That means on Monday I have to drive to Grimsby and pick it up and bring it to the boat for a test fit it, then return it to get finished....

What a long, tiring but productive day!


- Posted using BlogPress from my iPad

Tuesday, August 7, 2012

Just ONCE I Would Like Something To Go Without A Hitch!!!!!

So do you remember the other day when I was SO happy that the primer was down....

Well Today I spent most of my time RE-SANDING the primer because the idiot (me) who originally sanded the epoxy sealer didn't put on didn't sand it well enough and the primer refused to stick.... Grrrrr.


Now I just hope I have enough primer left over to touch up the places that I sanded....

I also got most of the bootstrap sanded....


We will see how things go tomorrow...

Yesterday I finally purchased the track that I need for the main mast. This track will be in place for the storm tri-sail. This means that it will be left at the bottom of the mast in a sail bag and can be raised with having to remove the regular mainsail.... Good thing too, cause' when a storm is rolling in I really don't want to be fooling around folding and stowing the mainsail....

One last thing, I contacted the paint company today and found out that I can  paint one coat of bottom paint now and apply the second one in the spring... That is if I ever get the primer sorted out....


- Posted using BlogPress from my iPad

Saturday, August 4, 2012

Primer..... DONE!

Yesterday, Shelley and I went to the mailbox and picked up the primer. Last night I added an epoxy barrier to the hull wherever I ground too far or in places I wanted more protection...


Today I got the primer coat completed... I used 5 1/2 of the 6 quarts that I purchased... Good guess! I took them into Home Depot and the people in the paint department were kind enough to shake them for me... The heat today was incredible! I had to work really fast as the paint was drying while still in the tray...


Now for the interesting news.... Last night I re-read the instruction sheets for the Trinidad SR bottom paint... In small print on the second page I noticed that as a part of the paint timing instructions, the writer talked about the "maximum" time before launching.... This turned out to be 60 days... Really? Who knew?

On Monday I will call the rep at Trinidad and double check.... If this is true I want to know why you can't leave the painted boat on the hard and I suppose that I will have to paint the bottom just before launching in the spring....

Just for fun...

Here is a picture of the hull taken last spring:


And Today:


Tomorrow I will get to work of the boot stripe....

Thursday, August 2, 2012

FINALLY.... Some Paint....

After my last blog entry, I decided that with Shelley at work, I could get something done at the boat.... So after supper I went back to the boat and got the epoxy primer on the keel... It looks GREAT!


- Posted using BlogPress from my iPad

I Take Back What I Said Yesterday.....

Ok, so yesterday I said I got the final coat of epoxy down and that today I would be priming.... No such luck... I started sanding at daybreak and at noon I realized that I needed to put one more epoxy coat on a few places...


Oh well, I suppose it is better that the hull is perfect BEFORE the bottom paint goes on... I hope other than maintenance, we will get 4 or 5 years out of this bottom job before we have to go through this again...


At the end of work today I installed the cheek blocks on the main and the mizzen masts for the lazy jack system for our new Mack Pack sail covers. I also installed the halyard block on the main mast for the inner forestay...
All in all, not a bad day....
- Posted using BlogPress from my iPad

Wednesday, August 1, 2012

Final Epoxy Coat...

Another long day of sanding and getting a final coat of fairing epoxy down.... The good news is that My father in law came to help today and we got lots done...  The first thing we tried since he turned out to be small enough to fit into the main anchor locker, was to try to get the seized bolt off....  After a dozen atempts, we gave up... we will have to cut that thing off another day....

So Ed sanded all the epoxy from yesterday and I was able to follow him and get some final epoxy down...


We also got the dinghy davit brackets re-installed on the transom... I replaced the 1/4" backing plate with a bigger 1/2" backing plate... Then we sealed it into place with some 3M 5200 adhesive... This thing will never move!


When Shelley got home she shared her shopping score... A local stationary store has announced a few lost leaders for their "Back to School" sale...This whole pile of stuff for less than $40.... Why you ask?, Well we are beginning to amass a container full of things that we can give to people in the places we visit. Things like crayons and school supplies are scarce in many of the places we plan to visit... This stuff will definitely not go to waste...

Weather permitting, I hope to get the 2 part epoxy primer on the keel tomorrow... At the end of the week we will go to our mailbox and pick up the rest of the primer so we can paint this weekend....


- Posted using BlogPress from my iPad